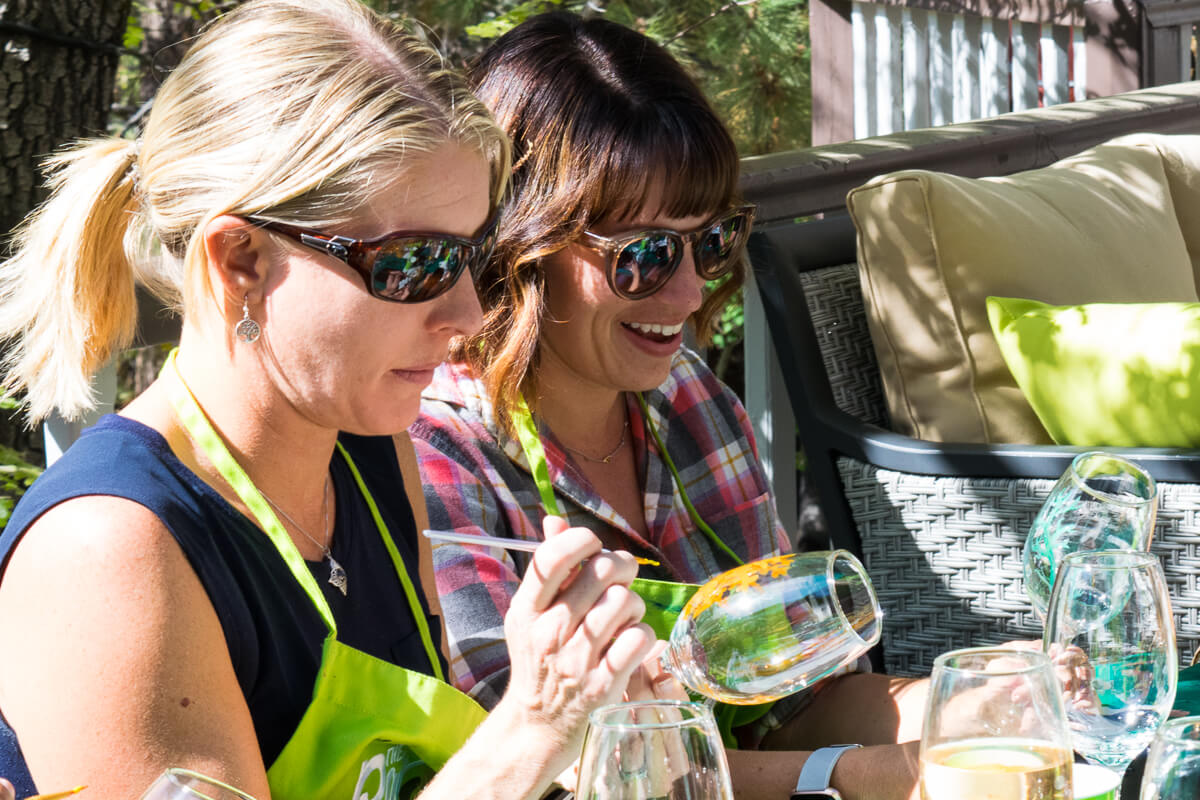
You wanted to know how to paint on wine glasses so we’ve put together the ultimate how to with our top tips and tricks when it comes to painting on glassware. Whether you’re painting on a wine glass, mug, vase, bong, etc its good to have some painting on glassware tips and tricks. If you’re used to only painting on canvas or paper, painting on glassware can be a very different experience. This painting on glassware tips and tricks blog article will give you some vital information for any beginners on how to paint on glassware.
Supplies Needed to Paint on Wine Glasses
- Paint Brushes – Brushes for acrylic paint or even craft brushes work best. Smaller liner brushes such as a size 0 or 1 are the perfect brushes for detail. A square brush such as a 8 is a great brush for filling in larger areas.
- Acrylic Glass Paint – The paint you use has to be for glass. Using other paints may result in washing off or chipping over time. Most craft paint suggested for glassware will have it noted on the packaging. They also make paint markers for glassware if you’re worried about doing a fine-detailed design.
- Water Cup – Great for rinsing your brush off in between colors.
- Paper Towel – Perfect for drying that brush off between use, and cleaning up any other messes if need be.
- Mixing Plate – We recommend a paper plate or plastic palette for mixing colors. Paper plates are good for one-time use. A plastic palette is a good option as well. You can rinse the paint off and re-use it for another paint session.
- Q-Tips – Q-tips make the BEST erasers for glassware. Just be sure to get it damp first with some water or rubbing alcohol. Bada bing bada boom! Your happy accident never happened.
If you’re looking for a glassware painting kit, we’ve got you covered! Less hassle, less stress for you get your own kit here.
1. Choose Your Wine Glass Design
This can sometimes be the hardest part of the whole project. What to paint?! I like to start by doing an image search for painted wine glasses on Pinterest or google. There are so many great DIY wine glass designs to choose from. To make your search easier, we’ve created even some stencils and starter wine glass painting stencils.
Free Printable Wine Glass Painting Templates
Do-It-Yourself Stencil – Making your own stencil or transfer can make the project easier if you have a specific design in mind. Simply trace your pattern onto a piece of paper, then tape that paper against the glass on the side opposite to the one you are painting. As you go along, the pattern will serve as a guide to know exactly where to add your paint.
Printable Wine Glass Painting Templates coming soon!
2. Paint On Your Wine Glasses
Now that you have all our supplies ready, you are ready to paint! Here are some tips & tricks that will help you in the process of creating your own glassware masterpieces.
*Please note: When you start adding paint to the glassware always paint on the outside of the glass, not the inside where liquids will be.
Clean Your Glassware
Before you can paint glass be sure to take the time to clean it thoroughly. This will help the paint to stick better and not leave any residue when you seal your paint.
Use warm to hot, soapy water in combination with a clean cotton cloth. (If you ordered one of our glassware painting kits you will receive some alcohol wipes. How Handy!) Wait for the glass to dry completely before you proceed. Also, be careful not to completely smudge the glass with your fingers, leaving behind a bunch of fingerprints.
Always Dry Your Brush
After rinsing the paintbrush off between colors make sure the brush is dried off before dipping it into a different paint color. Glass paint has a thinner consistency so if the brush still has water in it, the paint will become thinner, translucent and/or runny when applied to the glass. In other words, the paint might not “stick” properly. So dry that brush down!
Erasing
The most important thing to know while painting on glassware is that if the paint is still wet you can always “erase’ anything you don’t like with a q-tip, paper towel, etc. Just dip it in a little bit of water so that it’s slightly damp (not soaked) and erase whatever you don’t want. (If there is some leftover residue from the paint, just use a little rubbing alcohol or vinegar. )
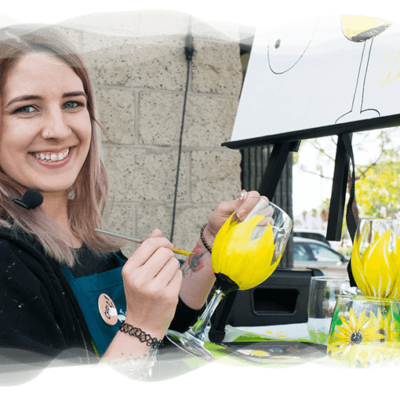
Painting Detail
Anytime you are painting detail you always want to use a small liner paintbrush such as a size 0 or 1. When you are holding the brush up to the glass be sure that you are holding the brush closer to the bristles, sort of like how you would hold a pencil. This offers more stability over the brush. giving you the most control of where your paint will be placed.
Filling in Larger Areas
When you are filling in larger areas on your glassware (such as a background), a square brush size 8 or medium size 10 round brush will do the best job.
Layers on Layers
Painting on glassware is a lot like painting your nails or wall, etc. It’s all about painting in thin layers. Instead of loading the glass up with a ton of paint, which will make it clumpy, paint in thinner layers. After the first layer let it dry before adding an additional layer. Having more than one layer of paint will also help the color to appear more vibrant. I know, I know it will take more time but you will be a lot happier with the result. You can’t rush perfection.
3. Cure Your Freshly Painted Wine Glasses
Anytime you are painting on glassware with glass paint it is a good idea to cure your paint. This helps the paint to last and makes it dishwasher safe! We always suggest following the instructions on the paint bottle or provided with your paints. There are two basic methods, you can air dry your piece or bake to cure, for more information on these curing methods, check out “Curing your painted glassware masterpieces“.
It’s Time To Use And Show Your Wine Glasses Off!
After the glasses have been cured they’re ready for use. Show them off at your next party or maybe it’s your new favorite wine glass, vase, mug, etc and you plan on using it daily. Either way, you should be proud of yourself trying something new and getting creative!
Let us know how our Painting on Glassware Tips and Tricks helped you. You can even tag us with your project by using our hashtag #ThePaintSesh. Is there a helpful painting tip we forgot? Please let us know in the comments below.
What rack in the oven is best for curing my beautiful glassware creations ? 🤷♀️. 😉 💋
MAMA RITA. 💋. 🍷. ☺️
I always use the middle rack to give them a nice even bake all around.
The painting didn’t come out bubbled like I wanted. Can I paint again and cure again on the same wine glass and expect a bubble this time… Puffy finish?